Showing posts with label animation. Show all posts

Monday, February 20, 2012

Salvage Youth - Inches from Alpha

With Alpha due Wednesday night, the majority of the team spent all three days of our holiday weekend working together to get the as much done as possible. It was great having everyone together, solving problems, working on features and polishing assets and layout. We didn't get every single thing done we'd like, but we still have a couple of days before Alpha itself is due.

We had a number of specific goals we wanted to really target as we got started.

  • Focus on polishing the first puzzle area after the tutorial
  • Get the character controllers working and feeling good to move around, jump and explore
  • Get the GUI system in and functional, including animated textures for status animations and our dialog popups to guide the player
  • Build and implement a system to control the camera for cinematic animations between puzzles to help guide the player
  • Fill the world with interesting scenes using the dozens of props we have implemented in the engine
  • Polish textures, lighting, tiling and level layout
  • Build any new assets needed to get the first section of level 1 working really well
Given this list, we got to work. We had a number of specific goals to address, and managed to get a ton of them done. By Friday of this week, we had a huge number of new assets, scripts and plans ready to go for our marathon work session.

One of the first things we did this week was address the lighting - we had only sort of blocked it in prior, and it needed work. We wanted to lighten up the assets and really focus on getting the feeling of warm sunlight and cool shadows. To do this, we tweaked the ambient light system to give us a cool baseline blue to work from, then used the directional light in Unity to get a nice warm yellow light, with a purple directional facing the opposite way to provide an additional fill. In the pictures below, the image on the left is our original settings, the image on the right is our new light system.


The clarity and enhancement it provides is remarkable. It makes a huge difference in how the game levels feel. We're going to try for an opposite approach for our tutorial section, which takes place in a sort of "bat cave" inside a mountain of trash bags, so the light will be a cooler night-time blue with a few god-ray shafts of sunlight peaking through holes in the mountain. It should provide a nice contrast and a great feeling of exploration to go from the first short sequence to a drastically different "main" world.

We also started looking for ways to really break up our environment more, and Beau created this paintover on how we can add streets receeding into the distance to create more of a feeling of distance and place. Before our level was a single long strip, and as you went up you could tell all the roads were just long parallel lines. This helps break that up and make the exploration feel like you're crossing from block to block.


He also created some new concepts for some plants and shrubs to help add more variety to the grasses that are overgrowing our neglected world of trash.


Alexi, naturally, whipped these into full 3d models in no time.

Alexi has been on an absolute roll this week. He re-styled the textures for the backyard fence and the rooftop planks to match the style we had on the pallet and crates.


He also created basic flood fills for our collectibles.


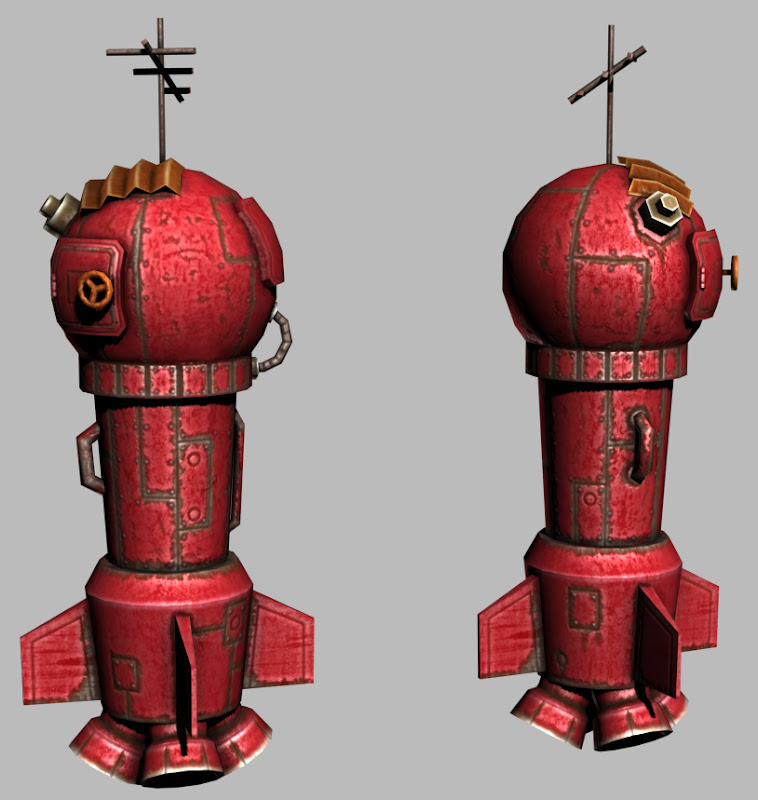
And as if that wasn't enough, he finished the texture for the rocket, which looks awesome.


He also made sure that we had access to all the bits and pieces from the rocket to use as extra trash throughout the game.


The rocket is the first major setpiece for our game and helps introduce the world and story to the player, and then takes us into our first in-game cutscene and introduces our crisis that the players spend the rest of the game solving - as you would expect, having been made by little kids, it doesn't work so hot. I grabbed the rocket model early this week and applied some very basic animations to make sure we could get the cut scene working in-game, and then gave it over to Jermz to work his magic on.


This, combined with a camera shake, textures, lighting and particle effects, looks so good in the game.

We got the new rocket model placed into the tutorial area and added a lighting system to help draw the eye to the goal - getting Dustin into the cockpit.


Visual cues like this, along with our camera animation system and dialog, are going to fix the biggest issue we've had in playtesting - our players don't know where they're supposed to be going or what their goal is. 

Knowing this, we spent a ton of time working with the iTween plugin and got a great camera animation system in and functioning well. Already we are guiding the player, using cinematic pauses in the game, to show them where to go next.

We put a ton of attention into getting our dialog system up and running, which was a pretty complex job. To get it fully functional we want it to:
  • Utilize the GUI system to float in front of the screen in a predictable location.
  • Pause gameplay during dialog systems.
  • Allow for pauses in dialog for camera animation.
  • Pull all dialog as strings from a database, to allow for localization into multiple languages and much easier editing.
  • Have animated images of the characters talking next to the dialog.
  • Have "typewriter" style text so that the letters appear rapidly one character at a time.
  • Allow the player to skip through the dialog at the press of a button.
All of this required a lot of systems to work together well. We didn't get all of it in yet, but we've got the GUI in and pulling from the database, we've got the script set up for the entire tutorial and all of the first two puzzles converted into the database, we have animated textures for the dialog rendered off of each character, we have the ability to show and hide the GUI at a key press, we can pause input for the scenes and we already have our camera animation system in. We have the basic tech in place to allow for triggers to occur to start the next sequence of dialog, there's just a lot of under the hood wiring that needs to take place to get it all working together, and we're working today and tomorrow to get as much of it in as possible before compiling the Alpha build.

To create the animated talking head textures, I got the character rig files and set up a light and camera rig, setting up the scene to hand over to Jermz to animate. Zach went through and made sure we had a suite of textures to apply to the characters, and using this system we would create a whole batch of PNG sequences rendered from the camera, with a transparent background, that we could pick and choose from to make our character appear to be talking. I set up the camera in each scene and created a three-point lighting rig, customized for each character.


With these, we can create the final marqueed images.


I was setting up the camera rig and testing a batch render for Stu when I accidently rendered from the wrong camera. The result, however, was so adorable I couldn't help but fall in love.

Look at him go! Awwwww.

Anyway.

A lot of my time this week was spent using the existing assets we had in the game and making new setpieces or background elements out of them, like this rickety-looking treehouse we have hidden off in the background.


I also modelled a whole bunch of new trash piles, using our tiling trash bag system, and created a ramp of trash to put next to our schoolbus, a setpiece for one of our puzzles. Once I had it in engine, I absolutely covered it in trash and other assets, trying to reach the level of "fullness" we wanted for our game. This is the first spot we have in that really feels polished and to the level of visual storytelling and neglect we want to convey our world.


We came up with a rather brilliant way of scattering lots of objects around in our world quickly - a system I like to call the AutoLitterer. Essentially we take a bunch of small objects, like the fast food bags and soda cans, add rigidbody physics and mesh colliders to them, duplicate them over and over, then just hit play and let gravity do the work. Once they settle, we can copy their locations and reset them back to their original place in the AutoLitterer, then paste in new instances of them back on the ground where they settled. Then we simply select the new trash on the ground, revert them back to their original prefabs and it strips them of the expensive collision and physics. Voila, instant trash!

In the background of the image above, you'll likely notice another new addition - Zach got us new grass textures in-engine, so now we have lanes and patchy areas of dirty and grass. Alexi also modelled up the new curb system with the corners and the "vertical" roads, and Beau painted new asphalt textures and crosswalks, completing the picture.

High up above this scene, we've got our Buzzbot chugging along. Jermz got these dudes animated, and combined with Zach's textures, they look awesome in the game.


In this picture, you can see the grass and patchy dirt textures a lot better, as well as another new addition - the trees are done! Beau made some really clever new geometry and textures for the leaves, and they really fit our game world a whole lot better.


He also got in some new low-poly versions to replace the ones in the background.


Steffani finished up the Work Bench, both in the high-poly for the main menu and the low-poly version for in the game, and it looks great.

The character controllers are now fully functional and feel a lot better to control - we've dialed in the speed and abilities of all of the kids, and got Dustin's double-jump ability in and working. Even better, we've got the animations for most of them working. The double-jump animation looks so good. I'll have video of gameplay coming soon, and I can't wait to show the whole world coming to life.

Speaking of which, there's another new addition we added this week. It isn't a critical feature by any means, but it looks really neat - trash blowing and tumbling in the wind. We took a couple pieces of the little trash from the AutoLitterer, then gave them limited mass and drag and applied a constant force. When we hit play, they roll and tumble down the street, gathering up in corners and moving past like tumbleweeds. It's another small little touch, but it really does add a lot of neat little life to the game.

Let's see, what else? Oh! We've got a way to record the gameplay footage now. This was all recorded on Saturday night, so a lot has changed since, but it's still cool to see it all together.


I think that covers just about everything so far. As I said, it was a busy weekend, and a ton of fun, even if we are all exhausted. We'll be working through tomorrow and Wednesday, as schedules allow, to get the last bits ready for Alpha. It still isn't quite as far along as we'd like, but it is so gratifying to see the game falling into place the team working together to get so much accomplished in so little time.

As we finish up Alpha, we'll be trying to polish up as much as possible through next weekend, then recording off gameplay footage and other neat stuff so that we can prepare it for GDC, which is just around the corner. Almost everybody on the team is going, and we're all looking forward to having a break from working on the game and getting out there and showing it off to everybody in San Francisco. 

See you next week!

Sunday, February 12, 2012

Salvage Youth - Countdown to Alpha

It has been another busy week, with a lot of our work being done on behind-the-scenes stuff as we shift into polish mode and try to get the gameplay revisions we've planned completed in time for Alpha.

Alexi has been going back and revisiting a lot of our old props, making sure that the art for them matches the style of our world.


He's gotten a first pass done on the rocket texture sheet. We're tweaking this a bunch, and he's already started on the changes for it, but we'll be getting the animation done for its cut scene this week. Should be fun.


Finally, he also worked on making some more low-poly terrain assets for the game, little bits of weeds and stuff we can put around in our environment to help tell the story.


We got a very cool little script running in our game now that was quick to put together and adds a very subtle but important feature in bringing our characters to life - we can swap textures on the fly now, and we tested it first by having the kids blink their eyes randomly every two to six seconds. It's a little thing, but it really does add to giving them some life. With this feature, we'll be able to swap in other "emotion" texture sheets as needed, like if one of the kids is distressed or if they do something correctly.

Laura has been hard at work getting things prepped for our opening cinematic, and she's really nailing the design of the kids. She has been creating some great storyboards for the cinematic, too.


Steffani created a fantastic rendition of Jenny's workstation that we'll be using for our main menu and in low-poly version in our game. She stayed really true to the original design, and it looks awesome.


Jermz has been creating some fantastic animation work, and we resolved our export issue - like most things, it came down to a single check box we were missing, but that little check box cost us a couple days of heartaches. Oh, technology.


We've started recording and importing sound effects this week, as well, which is going a long way to bring all of our hard work to life.

Finally, we have a whole ton of other code and design changes: getting the boss battle really working, fixing problematic camera issues, getting AI states in, throwing boxes from lane to lane, double jump for Dustin and better jump controls, all kinds of great stuff.

We've got another major deadline looming large, and then we're off to GDC shortly after, so this week is going to be a lot of nose-to-the-grindstone crunch time. We've been very carefully going over our list of features, additions and assets left and how much time we have total, so we're quite aware of the amount of work we have ahead of us, but we're all confident and excited - we're getting so close to getting our game in front of players, and that's the best part of all.

See you next week!

Thursday, July 14, 2011

Parkour Animation

The second piece of animation I did for my Ani399 physicality class was a short, 100-frame parkour piece. First step was to analyze my video reference and create thumbnails, timed out in flash.


Next was to build a stage and block in the animation in Maya.


I then took feedback in class and incorporated the suggestions into the poses, then began splining.


I took further critique from class, changed the set to be something a bit more dramatic, finessed the splines and rendered the scene.

Ninja Drop animation

I started taking a class in animating for physicality. The first piece I did was of a ninja dropping from the ceiling and then slinking away.

First step was to sketch out thumbnails based on my video reference.


I then took these and blocked in the key poses for the animation.


From there, I took the feedback from my class session and fixed some of the poses. I then I began splining the animation, first using linear and autoTangent and then finessing them a bit.


There was a number of issues, especially the "sticky" hand resulting in the IK/FK switching, which I hadn't done before. I fixed the issues I could and polished the splines, resulting in this rendered version of the animation, the final so far.

Sunday, April 24, 2011

PRJ350 - Week 14 Progress Journal

What a long, miserable day.

I've spent the last six or seven hours having to render out the first 140 frames of my animation one-by-one by hand, because if I don't, the volumetric "god lights" don't work. It is absolutely maddening, tedious and incredibly boring but it is nearly done.

So, what's changed since last week?

I spent a lot of time cleaning up the poses in my animation and fretting over what to do with the opening of it - the walk and his "surprise" reaction just never worked right for me, and it was getting far too close to the end to fix them. It was upon reflection to this problem that I had an epiphany.

I don't need them at all.

If I start the shot out with the goblin already looking at the sword, we get it. We understand the setup right from the get-go - he's a goblin, this is a sword in a stone. We know how this story goes. I needed to give him some time to consider the sword, to think about it and to ponder his approach, but trying to tell the story with him walking in was trying to tell too much. I needed to introduce his personality in his walk, his mood and why he might be feeling that way, then show a drastic, big change of emotion followed by another drastic change of emotion, from sad to surprised to cautious, all at once, and that is really, really hard. And really, really unnecessary.

I proposed the plan to Pam Matheus and Antony DeFato, both former Disney animators with excellent senses of story and timing, and they agreed it was the right decision. DeFato even brought the idea one step further - start the shot with the camera tight on the character so I could really play up his thinking process, then pull out to reveal the goblin's motivator. Genius.

I deleted my walk and surprise keyframes and got to work adding a good animated hold, using his eyes and slight shifts in the direction of his head to really try to get the subtle animation in to show his thinking process and then proceeded from there. Additionally, I spent a huge amount of time working on getting the spline pass done this week, all while working on wrapping up other assignments (expect more blog posts in the next few days as I finish work for my other classes). I really, really wish I had a few more days for this, or weeks, or months, but I'm happy with what I'm getting so far, and very happy with everything I've learned from the project. I know it isn't the strongest piece in the entire class, but it is the culmination of months of hard work, and I stand behind the result.

I'll have the final posted here in a few days, once I've had time to composite it, build in the title and credits screens and do the post-processing. I'll also follow this post up with a post-mortem, most likely, to review what went well, what didn't and what I'm taking away having gone through the process twice now. For now, I've got to render out the last of the frames (11 left to go, thank god), start the compositing and get some rest before the last big push of the semester.

Sunday, April 10, 2011

PRJ350 - Week 12 Progress Journal

What a week.

After reviewing the animation blocking I had completed last week and looking at the schedule I had left, I decided it was time for triage - I had to get rid of the bad blocking and do it over. It really didn't work well enough for what I needed, and it would have taken more time to try to fix it then it would have to just do it right. Having gone through the process, I feel I made the right decision, but the clock is ticking and I'm not particularly happy with what I'm going to have left at the end of the process - something I'll get into once I've completed the project and can do a post-mortem.

First thing I did this week was revise the basic lighting pass I had and get the "god lights" into the scene, as well as get the final props I was going to need in. I had to get this done, as the scene wouldn't work without them, and having the real things in rather then the proxies meant I could act to them rather then to where I assumed they would be in the final, then spend time later fixing the issues - time I wasn't sure I would have.


I would have liked to have modeled a custom sword for the scene, but I was on borrowed time, so I re-used an asset I had built for another class - the dagger from the table in my Bandit's Crossing interior scene. I stretched the blade out, tossed it into zbrush to get a better texture (the one I had wasn't working well at all, as it was grouped with a number of other items on the original texture sheet), a technique that worked well, as it allowed me to practice the process of baking out matcaps to the diffuse channel and get a better, more accurate normal map, something we'd been working on in my Zbrush class.

I got the sword into the scene and started tweaking the light setup. Most of the images shown are rendered with a test diffuse material on the goblin, as it shows up correctly in the viewport window and allows me to animate easier then with the SSS shader active - the SSS shader shows up as pure red in the viewport, making it difficult to read eye direction.


I messed with the godlight settings until I got them into the ballpark, then turned on the environment lights to make sure I'd have a strong enough effect to work in the composition, but not be too overpowering so that you couldn't read action happening behind them.


I ended up using two of the volumetric lights to get the falloff I wanted - one with a wider diameter but a softer effect, and a narrower, stronger one in the center to get a more powerful beam.


Finally, I turned on the SSS shader and played with a number of the shadow settings until I got exactly the look I needed - it still isn't ideal - the shadows have far harder edges then I'd prefer, but it is producing the desired effect well.


I then modeled out an anvil and textured it rapidly, using photoshop and Zbrush, got it into place and began blocking. I put in a lot of time between Friday and Sunday getting these poses in - I still have some timing issues to resolve and a few storytelling moments that need clarification and revision, but I am feeling more optimistic then I was earlier. I've rendered out some of the stills, as I would do often to ensure I was getting the result and composition I needed in the blocking, and it was often hard to tell in the viewport quite how things would look when rendered - these are all with the reference diffuse shader on the goblin, however, so keep that in mind.


Below is a copy of the revised blocking playblast. After speaking about my concerns about finishing the project in time with a number of professors, we revised the story beats a bit. I'm happy with the changes, although I'm going to miss some of the beats that were cut.


I'm nearly done with this phase, and hope to have it fully blocked by Wednesday so I can spend the rest of the week working on getting the spline pass completed. I'm not as happy with the result as I would be, but I spent too long in the rigging phase - the effort spent there was worth it, but it left me without the time I needed to spend elsewhere, and I learned a huge amount about something I was previously not proficient at at all. I also learned a lot about getting subsurface scattering shaders and modeling a character for animation, and am pretty happy with what I'm leaving with with the project, I just wish I could have focused further on the actual animation process during it.

Sunday, April 3, 2011

PRJ350 - Week 11 Progress Journal

Animation Blocking

I spent some time working on getting the base poses down for my character's initial walk-on before I realized I was being too hasty - I wasn't following my vid ref or my thumbnails, and with the complexity and length of the animation I had ahead of me, I really needed to have a better roadmap. To this end, I took my original vid ref into photoshop and began tracing over each major key pose onto unique layers. Doing this gave me a better insight to the lines of action in the pose and was a much more accurate and quick way to sketch out the poses then it would be to do so by hand on paper just using the video as reference.


Once I had these initial sketches, I composited them to the sheets above and printed them off. I also began adding them to Flash on the original frame numbers so that I could watch how they moved. This is a lengthy process, so I only got the first portion done, but it is very effective. One benefit of this process is I can quickly and easily play with timing, rather then trying to push and pull dozens of keyed object keyframes in Maya.


Once I have a little more time, I can start playing with the timing and get the rest of the frames in, but I wanted to make sure I had a chance to work on getting initial poses into Maya. I brought up my animation file and worked on getting the first pose right - it tends to be one of the most important ones. In the case of my animation, I actually started with the second pose, the first that the goblin is fully on-screen. I can work backward to have him walk on, but I needed to ensure that I had the right starting position figured out.

I then worked on following my thumbnail roadmap, being careful to exaggerate each pose to really enhance the action and to fit better with the character's proportions and anatomy, and really try to make sure I had the right arcs in place for the IK hands - a tricky process. I got the first part of the walk in, his notice and take and his approach blocked in after long hours of moving him around, and already am noticing severe issues with the skinning I'll have to address - this was part of my plan, as I knew they'd start making themselves more noticed once I started the actual animation, and I'll be working on them soon enough.


All told, things are coming along well, and the animation is working out okay, although I'm already noticing major problems with the timing. The beginning of this week will be spent getting the final models for the props in, getting the lighting resolved and blocking in the next portion of the animation. I'm right in the thick of crunch time now, so everything has to really count, but I'm really excited to see the little guy coming to life.

Sunday, March 27, 2011

PRJ350 - Week 10 Progress Journal

Huge amount of progress this week, although much of it isn't readily visible - a lot of behind-the-scenes prep for the next big push - animation blocking.

I began by building out my basic environment, using a technique I learned last semester in CG300 to create a tree, then duplicating it and tweaking it to create a second. Essentially, I built a cylinder, then used a number of latices and nonlinear bend and twist deformers to create the central trunk, then duplicated that shape and scaled it and twisted it to create the branch shapes. I then cut the hole for the branch in the main trunk and combined the meshes, using target weld, and pushed the combined verts around until I had the shape I wanted.


I then exported the tree from Maya into Max and unwrapped it, as I prefer the pelt and relax unwrap tools available there to Maya's unwrap options for organic shapes. I had a good wood bark photo in my reference library that I converted into a tiling texture, then applied it to the re-imported tree shape in Maya, repeating the bark texture as many times as needed to get the scale to look right.


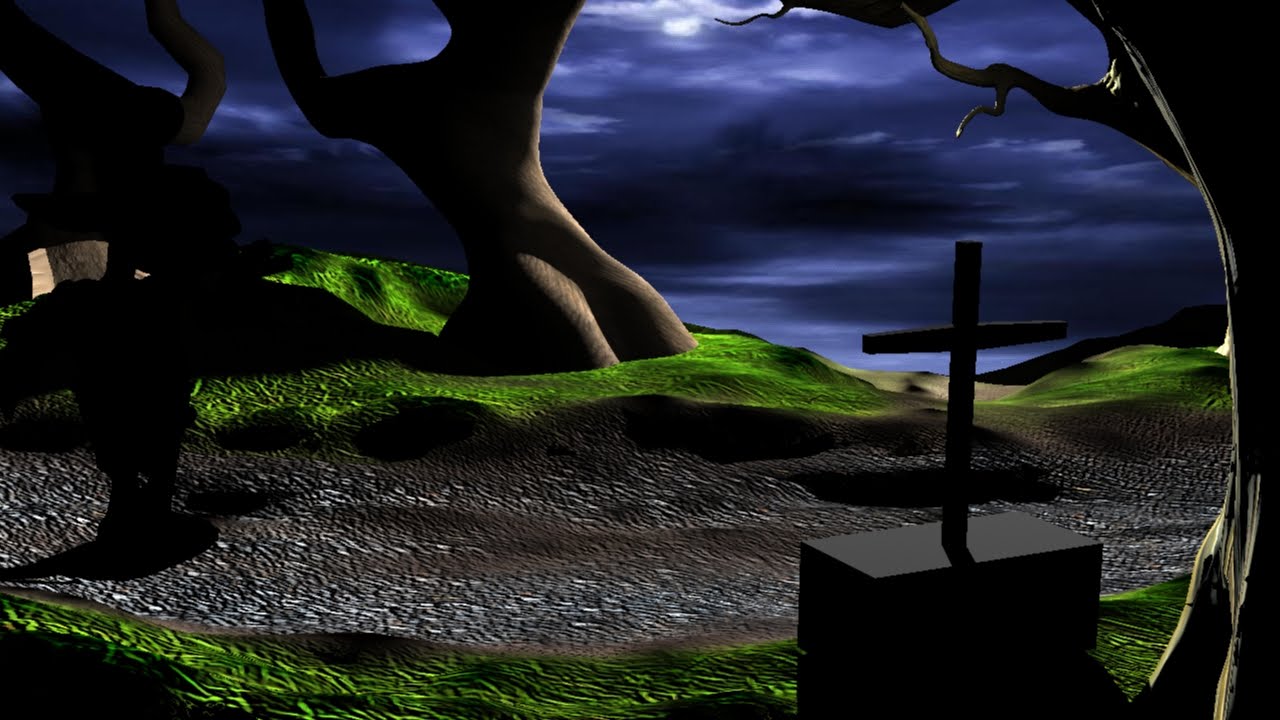
Once that was done, I exported the ground plane into Mudbox to sculpt it, creating a roadway sunk into the ground and a slight valley where the main action was going to play out in the scene, allowing the sword and goblin to break the horizon and be silhouetted against the sky. I then re-imported this into Maya and got it placed where it needed to be.


I then brought in a tree from a previous project to save time and add variety to my scene, one that had been sculpted in Mudbox - it is a bit higher poly then I'd like, but it will look great rendered, and I can always render the background plate separately from the foreground elements, since the lighting won't move - this will likely be a necessity once I get the high-poly grass laid in. I also brought in a copy of the goblin's mesh, to make sure the scale was going to work well. I blocked in the camera and deleted any of the polys from the foreground tree that weren't going to be part of the final render, to cut down on excess geometry,


Finally, I got the textures set up for the ground plane and new trees, as well as the sky background. They're still not perfect, but they're looking okay so far. As I mentioned previously, I'll be painting in high-poly grasses in the foreground and background to help add a better finished look to the scene and create a more realistic environment, but for the blocking phase this is unnecessary, as it creates a huge overhead for rendering and file size, and makes it very difficult to work on the school's sub-par 32 bit systems as they tend to choke on high-poly scenes. I'll likely end up adding the grass fairly soon and making sure it is on a separate layer, so I can turn it off when I don't want it in the scene. It will also make the rendering process easier, having them out of the way.

I also brought in the fully rigged character model at this time, so I could begin test renders. This was a tricky process, as I often lost a lot of the shader information or rigging if it wasn't done correctly. I ended up spending an hour or two cleaning up old garbage left behind in both scenes, lots of hidden geometry and rigging artifacts that aren't used and won't ever be used, to facilitate the process. To get the merge to work best I ended up importing the environment into the rigged character file, rather then the other way around, then going through and carefully removing and renaming things that may present problems in the future.


Once I had the two files properly merged, I had to spend some time fixing some rigging issues and adding the last few controllers I needed for the rig that had gotten missed previously - in particular, I had somehow neglected to add nurbs shapes for controllers for the loincloth and ear joints. Once I had them in place and the model was ready to animate, I wanted to get a rudimentary lighting pass done, as I knew it was another critical, tricky step that I would likely need assistance and feedback on, so better to get it started now.


The first lighting pass was problematic - some of the lights didn't want to work properly, I was inheriting lights from the previous rigging file that weren't visible in my scene view but overpowered everything in my render, and the shader for the goblin had to be rebuilt.

I had a lot of notes left over from last time I built the shader, so it was simple enough to re-link the files and tweak some of the settings to get it in - I need to revisit it soon, however, as the light is passing through the character far too strongly and ruins the effect, causing the little dude to glow a bit.


Once that was corrected, I moved him to the point where he'll first stop and see the sword and anvil (the sword and anvil are currently just placeholder geometry - I need to model them both this week, and they don't really have much on them in terms of lighting).


I also put the character into his first real test pose - I will need to revisit a lot of the blend shapes, I've got a handful of them built now and I imported a dozen or so meshes of the goblin to use for other blend shape targets once I get the basic blocking in, as it will be easier to build target sculpts then, since he is a one-off rig.


And that's where we're at for the moment. I'm hoping to get some more of the base poses in tonight, but I wanted to get this blog post up before midnight, and I've got to go to a quick birthday dinner for a friend. All in all, I'm feeling a lot more confident about the scene and am excited about the next few weeks, although there is a huuuuuge amount of animation to get done for this project, and not a lot of weeks left to do it.