
Tuesday, March 15, 2011
Acting to Dialog 2 - Blocking Plus and Polish Pass
The above is the Blocking Plus stage of my second dialog animation. The initial blocking stage is viewable in a previous entry, available here. In this stage, I have begun working on smoothing the animation together in splines, but haven't yet had time to really finesse the motion. I'm mainly trying to get the first set of motion in, to ensure the timing works and the body moves between poses well.
In this pass, I begin working in the graph editor to really focus on getting the motion as smooth and natural as I can. I mainly focused on body mechanics in the feet, hips and torso, as well as tracking the arcs in the punching arm and the head. I'll be making one more pass at this to refine the animation before moving on to my final scene for the class.
Sunday, March 13, 2011
Projects 350 - Week 7 & 8 Progress Journal: Rigging, Skinning, Blend Shapes and Animatics
The past couple of weeks have been a headache, but they've been incredibly productive when I've been able to work. I'm a little behind the projected schedule, but as soon as I can get past this last little hump and get through this upcoming ridiculously busy week, I should be right back on track - I'm both in a wedding and interviewing for a very exciting potential job this coming Thursday, and preparing for both has required a lot of attention that I hoped to devote to this project this last week.
I spent the first part completing the rig, learning the ins and outs of how to set up a biped rig in Maya. This is a very tricky, very technical process, and definitely not my specialty, but it is done now, and very functional.
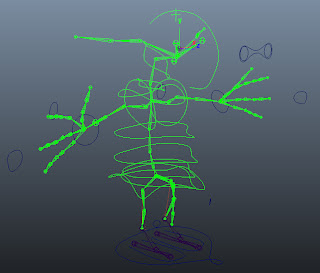
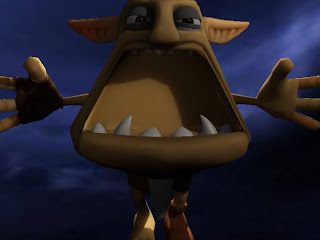
I've got a lot of features built into the rig shown above - both arms and legs are IK driven, and I have a reverse-foot setup, allowing me to keep my heels locked on the ground, roll onto the balls of the feet and do all sorts of other great functions. I have a fully articulated spine, a jaw bone for controlling limited facial animation, duo-jointed ears, bones for the eyes, and a series of bones set up to allow secondary animation on the loincloth.
The eyeballs and eyelids themselves are set up on the eye controllers, and I created a locator object above the character's head to allow him to tip his head to the side without causing odd pivoting or rotation action in the eyes or eyelids.

All eye activity is controlled through a series of controllers, using the Set Driven Keys commands in Maya. Through this technique, I can control blinking, eye direction and eyelid rotation, all through a single controller. This functionality was used on the hand controller, as well, allowing me to grab a single object to control the rotation of all finger joints, the spread of the fingers and limited rotation of the palm for exaggerating the form.
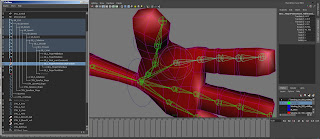
When I was rigging one of the hands, I came across a strange problem - all of the translate options for one of the finger joints was just... missing. It appears that somehow the transform node was, at some point, removed, leaving the only available keyframe-able option as Visibility, not a feature I need a lot in animation. The solution for the problem ended up being rather clever - I created an empty group object, basically a null object in Maya that doesn't have any actual data or anything attached to it beyond transform data. I then unparented the finger joint from its hierarchy, parented the null node onto the joint, and then moved the set back into the hierarchy. A little convoluted, but it solved the problem and allows me full functionality of the hand again.
I've also been working on my skinning, which is proving a little more problematic then I had originally anticipated, but it is coming along. I'm looking up further tutorials and other information from experts to assist, but I've got a good range of poses set up, it's just a matter of figuring out the strategy and learning what the model and rig can and cannot do. In the process, I'm learning a lot about how to better design topology for deformation, as I realize precisely what the theory really means, now that I can see it in action on a model that was this carefully planned.
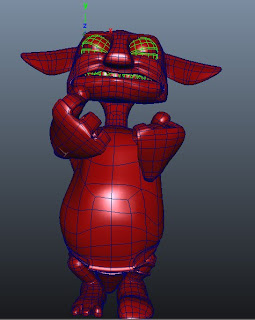
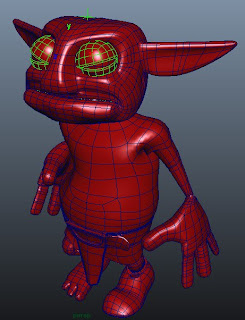
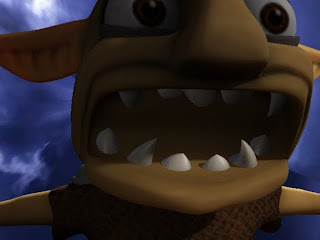
Another success is that I finally got the mouth complete - I was having a huge issue getting teeth to parent correctly to the jaw bone and rotate right. No matter what I did, the teeth seemed to move twice as far as the lip would, meaning his teeth would receed or shoot right out of his mouth. It turns out that the lip was inheriting some of the skin weight from somewhere else, but that has since been remedied and we now have a great looking set of chompers.
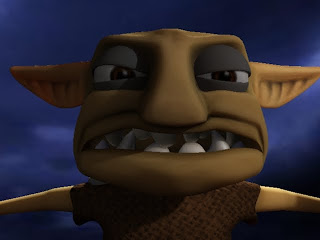
Once I got them in, I ran the character through a number of facial poses, using the blend shapes I had set up and learning how he looks as his face distorts. Turns out? Adorable.
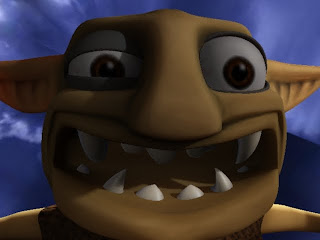
I even discovered, by moving and scaling the jaw bone, some additional functionality that the model possesses that I didn't realize - a happy little accident. Behold:
I've also begun work, and am about halfway done with the initial drawings for, the animatic, a useful stage in which staging and timing issues are resolved before moving toward animation. In doing so, I also created a more resolved version of the background image.

It is still a very loose and unresolved piece, but it solves a lot of the composition problems I had before, and getting the more final model of the environment complete this week, getting grass into the shot and getting hte first lighting pass is going to be very exciting.
Right now, though, I really, really just want to get this skinning done with so I can move on to starting the animation work. Time is running short, and there is a huge amount of work left to do.
I spent the first part completing the rig, learning the ins and outs of how to set up a biped rig in Maya. This is a very tricky, very technical process, and definitely not my specialty, but it is done now, and very functional.

I've got a lot of features built into the rig shown above - both arms and legs are IK driven, and I have a reverse-foot setup, allowing me to keep my heels locked on the ground, roll onto the balls of the feet and do all sorts of other great functions. I have a fully articulated spine, a jaw bone for controlling limited facial animation, duo-jointed ears, bones for the eyes, and a series of bones set up to allow secondary animation on the loincloth.
The eyeballs and eyelids themselves are set up on the eye controllers, and I created a locator object above the character's head to allow him to tip his head to the side without causing odd pivoting or rotation action in the eyes or eyelids.

All eye activity is controlled through a series of controllers, using the Set Driven Keys commands in Maya. Through this technique, I can control blinking, eye direction and eyelid rotation, all through a single controller. This functionality was used on the hand controller, as well, allowing me to grab a single object to control the rotation of all finger joints, the spread of the fingers and limited rotation of the palm for exaggerating the form.

When I was rigging one of the hands, I came across a strange problem - all of the translate options for one of the finger joints was just... missing. It appears that somehow the transform node was, at some point, removed, leaving the only available keyframe-able option as Visibility, not a feature I need a lot in animation. The solution for the problem ended up being rather clever - I created an empty group object, basically a null object in Maya that doesn't have any actual data or anything attached to it beyond transform data. I then unparented the finger joint from its hierarchy, parented the null node onto the joint, and then moved the set back into the hierarchy. A little convoluted, but it solved the problem and allows me full functionality of the hand again.
I've also been working on my skinning, which is proving a little more problematic then I had originally anticipated, but it is coming along. I'm looking up further tutorials and other information from experts to assist, but I've got a good range of poses set up, it's just a matter of figuring out the strategy and learning what the model and rig can and cannot do. In the process, I'm learning a lot about how to better design topology for deformation, as I realize precisely what the theory really means, now that I can see it in action on a model that was this carefully planned.


Another success is that I finally got the mouth complete - I was having a huge issue getting teeth to parent correctly to the jaw bone and rotate right. No matter what I did, the teeth seemed to move twice as far as the lip would, meaning his teeth would receed or shoot right out of his mouth. It turns out that the lip was inheriting some of the skin weight from somewhere else, but that has since been remedied and we now have a great looking set of chompers.

Once I got them in, I ran the character through a number of facial poses, using the blend shapes I had set up and learning how he looks as his face distorts. Turns out? Adorable.


I even discovered, by moving and scaling the jaw bone, some additional functionality that the model possesses that I didn't realize - a happy little accident. Behold:

I've also begun work, and am about halfway done with the initial drawings for, the animatic, a useful stage in which staging and timing issues are resolved before moving toward animation. In doing so, I also created a more resolved version of the background image.

It is still a very loose and unresolved piece, but it solves a lot of the composition problems I had before, and getting the more final model of the environment complete this week, getting grass into the shot and getting hte first lighting pass is going to be very exciting.
Right now, though, I really, really just want to get this skinning done with so I can move on to starting the animation work. Time is running short, and there is a huge amount of work left to do.
Subscribe to:
Posts (Atom)