Subsurface Scattering Shader Setup
At the beginning of the week, I got a chance to get my diffuse map painted a little, with a start getting the head and hands a little bit more textural. Once I had a decent start, I began testing out the capabilities of the FastSSS shaders in Max, as I had heard they were a little simpler to use, and my finished model hadn't been exported to Maya yet. I played with the settings a bit and was astonished with the result. I quickly built a base specular map by converting my diffuse to greyscale and painting over the parts that needed tweaking (eyes, shoulderpad, etc) and made a rough normal map using the NVidia photoshop plugin. Enjoying the result, I created a quick turn-around set and rendered it out to use as a target for setting up the shader in Maya.
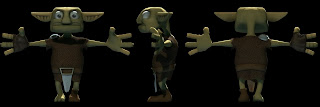
The detail and effect of SSS was astonishing, as it was my first chance to play with it and see the result. Even better, it really didn't add to the render time to any major degree. I burned off another closeup render to use as a target for the Maya shaders and got to work in the other program.
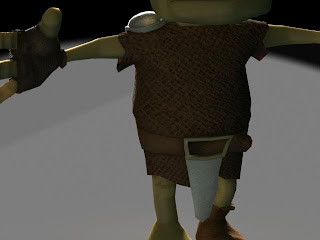
The Maya shader system, being node-based, offered a lot more control but was considerably trickier to get fully functioning. I found a wonderful set of free video tutorials over on Gnomon's site and went through them, taking a couple hours to really make sure I understood the concepts - longer then I hoped to spend, but I think it will be far worth it in terms of quality of the final product gained for the investment.
First I got the basic shader set up and began with the normal map, making sure it was still going to function properly, as the added simulated contour would help inform how the shapes were going to look in the renders, and it would tune the basic three-point lighting system I had set up.
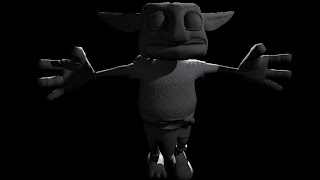
I then began tweaking the different shader settings, beginning with the back scattering.
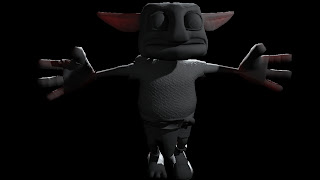
Once I got this blocked in, I recorded the settings, turned it off and blocked in the Epidermal Scattering layer.
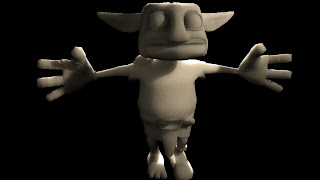
Again, once this was blocked in, I turned it off and began the Subdermal layer.
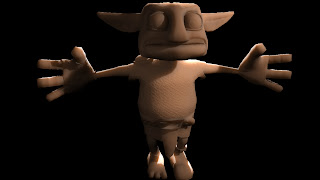
I then began turning them back on, first adding a color map to the backscatter layer.

Then I brought the color map to the other layers and spent time fine-tuning the weights between them.

As you can see, it really knocked back the effectiveness of the shader, especially the normal map, but much of it is due to the fact that the different shader layers need to be painted more to get the most out of this. Also, at this point I didn't have the specular layer applied. I brought in the specular map I had created before and set it up in a rudimentary fashion, and then had to call it a day for this part of the process, as I had an appointment to work on the rigging.

I'll be going through the tutorial more to learn to fine-tune the specular layer, and will be following another tutorial on setting up a shader for the eyes separately from the rest of the mesh. I may also set up a new shader for the shoulder pad and the metal of the loin cloth and belt buckle, and possibly the cloth of the old sack he's wearing. The overall paint still has a lot of work to do, adding details and defining the shapes and contrast, but for a lay-in test this is working very well, in my opinion.
Rigging
I also spent a lot of time this week meeting with various folks about getting my rig set up - I worked with Suzanne Kaufman for a while, who showed me a lot of great stuff, but it was a lot like drinking from a fire hose. She was rushed as she had other appointments to make it to, and she knows a ton about the process and how to do it right, but we just didn't have the time together to really cover everything.
Megan Noble was quite helpful earlier this week, showing me how to create new attributes for controllers, how to orient joints and a number of tricks when it came to setting up the skeleton, as well as just answering questions when I'd get stuck or confused.
Earlier today, I spent a couple hours with Micah Zahm, who was gracious enough to give a couple hours tutoring me on the process of setting up a rig the correct way in Maya, teaching me about simple things I was doing wrong that can break a rig, and the best ways to do it right. It was incredibly helpful, as rigging has always been my downfall before, and he showed me a number of things I found very enlightening about the process.
Already, I'm finding Maya a much better system for all of this stuff then Max, at least in my limited knowledge. I was able to set up a full skeleton pretty quickly, and actually did it a few times before arriving at the final design.
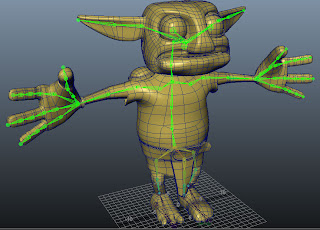
I have a whole suite of features built into the design of the rig that I needed in order to have the most success in the limited amount of action I'm planning for the character. Ideally I'd like to use the character for other things later, but for the time being and my current needs, he's going to work out great, I think.
Micah was very helpful in showing me how to set up a reverse foot rig setup, and helped explain exactly how it works, which is something I've never been able to comprehend precisely before.
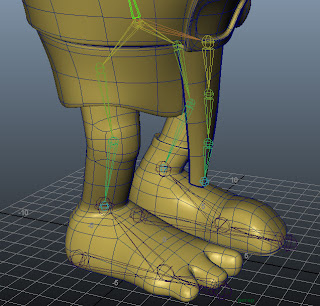
Essentially, the bone at the bottom of the foot doesn't get skinned to the mesh, it sits along the ground to allow the rig to pivot on its heel, but still allow the model to rise up on its toes or rock on the ball of the foot without lifting the foot controller but still moving the ankle IK, making the knee follow, as well.
You may also notice he's got a "wiener bone", as it was jokingly named. That is a series of bones created to be skinned to the loin cloth mesh only, allowing for secondary motion as it flaps around when he walks.
I've also set up a pair of bones for the eyes, which have Aim Constraints for the controllers which float out front.
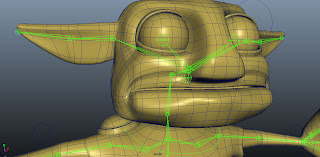
The eyeball mesh is skinned entirely to those joints, and the joints themselves are parented to the head joint to make them follow in space. This lets the eyes rotate around inside the head without moving, but they follow the head as it moves. Just below the head joint is a joint for the jaw. I'm going to build two sets of teeth - one for the top row, which will be parented to the head joint, and one for the bottom row, which will be parented to the jaw joint. This will allow him to open his mouth and have the teeth follow. Finally, I have a pair of joints set up for the ears, allowing a lot of expression and secondary action in them.
I also spent a lot of time getting the hands set up to a controller. The hands themselves are IK controlled, and are moved by the wrist controller. The wrist joint itself has an orientation constraint to the controller, which allows the arms to be moved by grabbing and pulling them around, but keeping the hands oriented to the world, as they should be. This will be a little trickier in the animation, as it can be hard to maintain proper arcs with IK rigs, but they're necessary to lock down the hands in the world space when putting any weight or grabbing onto objects.
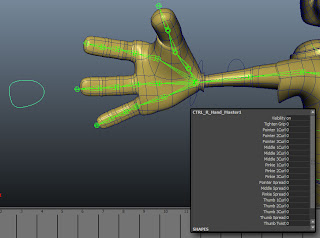
I also added new attributes to the hand controller and mapped them to the fingers, so that instead of grabbing controllers on every little joint I can manipulate them from a single space - much, much easier to work with and animate this way.
I still have a bit more to do to finish the controllers, and have a LOT of work to get the deformer targets built for all the expressions he needs (blinks, scowl, wonderment, confusion, grimace, grin, elation, surprise, etc), but I'm getting much closer, and am moving through a step that was previously daunting, thanks to the help of some very kind folks.

No comments:
Post a Comment